

Last Updated: April 8, 2025
Quick Answer Box
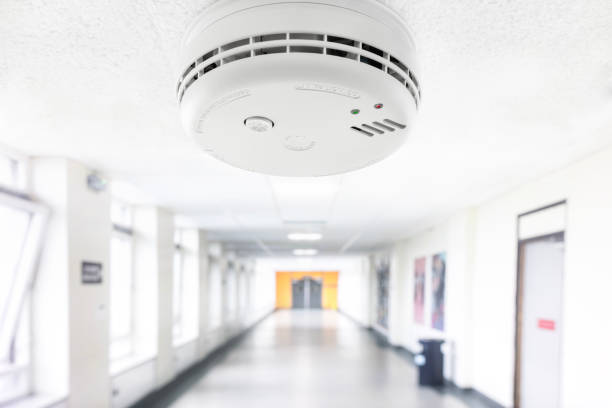
How to Remove Battery from Smoke Detector:
- Locate the chirping detector
- Twist detector counterclockwise to remove from mounting bracket
- Disconnect wiring if hardwired
- Open battery compartment door
- Remove old battery noting its position
- Insert new battery in correct orientation
- Test detector before reinstalling
- Twist clockwise to secure back on mounting bracket
Introduction
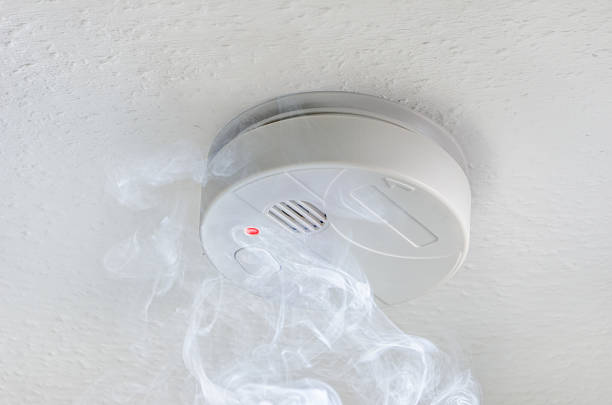
That incessant chirping from your smoke detector always seems to start in the middle of the night or when you’re trying to focus on something important. The annoying beep every 30 seconds is your smoke detector’s way of telling you it needs a battery replacement – a critical maintenance task for your home’s safety system.
Knowing how to remove battery from smoke detector properly is an essential skill for every homeowner. This comprehensive guide walks you through the process of silencing that irritating chirp by safely removing and replacing your smoke detector’s batteries, ensuring your home remains protected from potential fire hazards.
Why Smoke Detectors Chirp
Before diving into how to remove battery from smoke detector units, it’s important to understand why they make that annoying chirping sound in the first place. Most smoke detectors are designed to emit a short beep approximately every 30-60 seconds when the battery power is running low.
This sound is intentionally annoying to ensure you don’t ignore it. After all, a non-functioning smoke detector puts your household at significant risk. According to the National Fire Protection Association, three out of five home fire deaths occur in properties without working smoke alarms.
When to Replace Smoke Detector Batteries
Knowing when to replace your smoke detector batteries is just as important as knowing how to remove battery from smoke detector units properly. Fire safety experts recommend replacing smoke detector batteries:
- At least once per year (mark your calendar!)
- Whenever the low-battery chirping begins
- When moving into a new home
- After power outages
- When the test button fails to trigger an alarm sound
Many fire departments suggest the “Change Your Clock, Change Your Battery” approach – replacing batteries during daylight saving time changes in spring and fall. This creates a regular schedule and ensures your detectors always have fresh power.
⚠️ SAFETY WARNING
Never leave your home without functioning smoke detectors. If you must remove batteries, do so one detector at a time and replace immediately. According to FEMA, you may have less than 2 minutes to escape a home fire safely.
Common Types of Smoke Detector Batteries
Before learning how to remove battery from smoke detector, it’s helpful to know what type of batteries you’ll need for replacement. Most smoke detectors use one of the following:
- 9-volt batteries (most common in older models)
- AA batteries (typically requiring 2-3 batteries)
- Lithium batteries (for long-life models)
- Built-in non-replaceable batteries (typically lasting 10 years)
Always check your specific model’s requirements before purchasing replacement batteries. For best performance, use high-quality alkaline or lithium batteries from trusted brands.
Tools Needed to Remove Smoke Detector Batteries
Replacing smoke detector batteries is generally a straightforward process requiring minimal tools. Here’s what you’ll need:
- Step ladder or sturdy chair
- Screwdriver (flathead or Phillips, depending on your model)
- New batteries of the correct type
- Dust cloth (optional but recommended)
Safety is paramount when working with any home safety device, so ensure you have a stable surface to stand on and good lighting.
Step-by-Step Guide: How to Remove Battery from Smoke Detector
Now let’s walk through the detailed process of how to remove battery from smoke detector units. While specific models may vary slightly, these general steps apply to most common smoke detectors.
Step 1: Locate the Chirping Detector
In homes with multiple smoke detectors, first identify which one is chirping. The sound can sometimes be difficult to pinpoint, especially in larger homes. Walk around and listen carefully to determine which unit needs attention.
Step 2: Prepare for Safe Access
- Position your ladder or chair directly beneath the smoke detector
- Ensure the ladder is stable and locked in place
- Have your replacement batteries ready
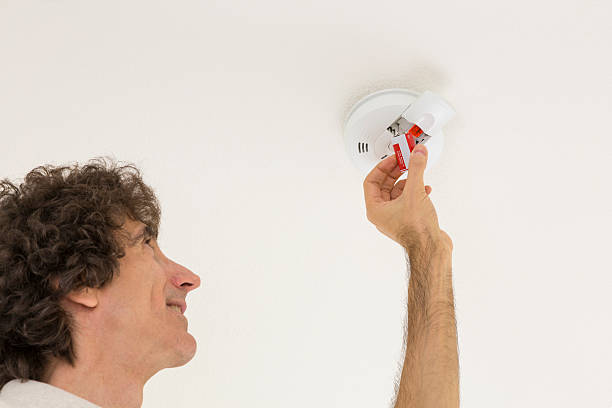
Step 3: Remove the Detector from its Mounting Bracket
Most smoke detectors are attached to a mounting bracket on the ceiling or wall. To access the battery compartment, you’ll need to remove the detector from this bracket. Based on your smoke detector type, follow one of these methods:
For Twist-Off Models (Most Common)
- Grip the smoke detector firmly
- Twist it counterclockwise (to the left)
- The detector should rotate and detach from its mounting bracket
For Models with Release Buttons
- Look for a release button or tab on the side of the detector
- Press this button while pulling the detector away from the mounting plate
- The detector should come free from the bracket
For Hardwired Models
If your smoke detector is hardwired into your home’s electrical system:
- Twist the detector counterclockwise to release it from the mounting bracket
- Gently pull it down a few inches
- You’ll see a wire connector (harness) connecting the detector to your home’s wiring
- Squeeze the plastic clip on the wire harness and disconnect it
- Now the detector is free for battery replacement
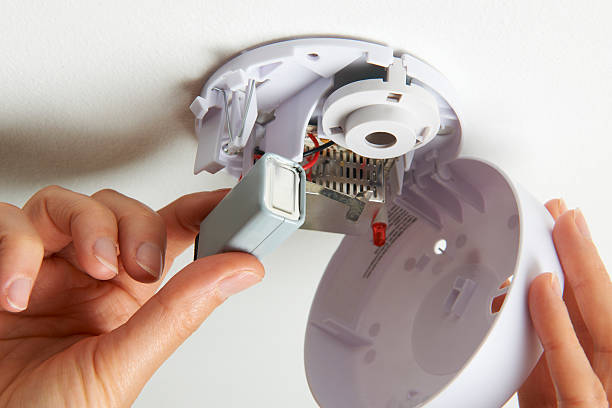
Step 4: Access the Battery Compartment
Once you’ve removed the detector from its mounting bracket, you need to locate and access the battery compartment. The location varies by model:
Rear-Loading Battery Compartments
- Turn the detector over to view its back side
- Look for a rectangular or square compartment door
- Slide or press the compartment door to open it
- The battery will be visible inside the compartment
Front-Loading Battery Compartments
- Look for a side or front panel that can be opened
- Press down or squeeze the designated area to release the door
- The door should pop open, revealing the battery inside
Models with Sealed Battery Compartments
Some detectors require a small flathead screwdriver to open:
- Locate the small slot on the edge of the battery door
- Insert the screwdriver and gently pry open the compartment
- Be careful not to use excessive force that might damage the plastic
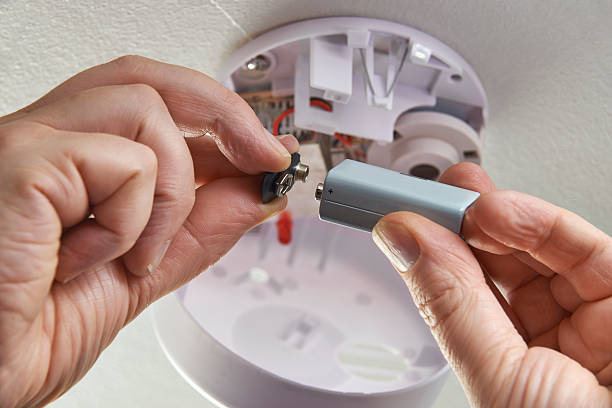
Step 5: Remove the Old Battery
Now you’re ready to learn how to remove battery from smoke detector compartments:
For 9-Volt Batteries
- Grasp the battery firmly
- Pull it straight out from the connector clip
- If the battery is stuck, gently wiggle it while pulling
- Never use metal tools to pry out the battery
For AA or AAA Batteries
- Note the orientation of the batteries (the + and – positions)
- Push against the negative end and lift the battery out
- Remove all batteries in the compartment
For Stubborn Batteries
Sometimes batteries can get stuck due to corrosion or tight fit:
- Tap the detector gently against your palm to loosen the battery
- Apply slight upward pressure on the plastic backing opposite the battery terminals
- For severe corrosion, you may need to replace the entire detector
⚠️ SAFETY WARNING
When handling corroded batteries, wear gloves to protect your skin from the caustic chemicals. Never touch your eyes after handling corroded batteries without washing your hands thoroughly.
Step 6: Install New Batteries
While this guide focuses on how to remove battery from smoke detector units, proper installation is equally important:
- Ensure the new battery is the same type as the original
- Orient the battery according to the polarity markings (+ and -) in the compartment
- Press the battery firmly into place
- If there’s a battery reminder finger or tab, ensure it’s properly positioned
Step 7: Test the Detector Before Reinstalling
Before mounting the detector back on the ceiling:
- Close the battery compartment door securely
- Locate the test button on the face of the detector
- Press and hold the test button
- The alarm should sound loudly, confirming the new battery works
Step 8: Reinstall the Detector
To complete the process:
For Battery-Only Models
- Align the detector with its mounting bracket
- Twist clockwise until it locks into place
- Give it a gentle tug to ensure it’s secure
For Hardwired Models
- Reconnect the wire harness to the back of the detector
- Align the connector pins carefully
- Push until you hear it snap into place
- Mount the detector back on its bracket by twisting clockwise
- Test again after installation
Watch Our Video Tutorial
For a visual demonstration of how to remove battery from smoke detector units, check out our comprehensive video guide. The tutorial walks you through each step with clear instructions for various detector models.
Special Instructions for Different Smoke Detector Models
Learning how to remove battery from smoke detector units can vary by brand and model. Here’s how to approach some common varieties:
First Alert Smoke Detectors
First Alert models typically feature a side-loading battery compartment:
- Remove the detector by twisting counterclockwise
- Look for the word “OPEN” with an arrow on the detector’s edge
- Slide the compartment door in the direction of the arrow
- Remove the 9V battery by pulling it straight out
- First Alert’s website offers model-specific guides
Kidde Smoke Detectors
Kidde detectors often have front-loading battery compartments:
- Remove the detector from the ceiling bracket
- Locate the battery door (usually marked)
- Press down on the battery door and release to pop it open
- Remove the battery
- For detailed instructions, visit Kidde’s support center
Nest Protect and Smart Detectors
Smart smoke detectors like Nest Protect have special battery access:
- Remove the detector using the app instructions
- For Nest, press the center button and twist counterclockwise
- Access the battery compartment on the back
- Remove the batteries according to the marked instructions
- Check Nest’s support page for specific guidance
Troubleshooting Battery Removal Issues
Even after learning how to remove battery from smoke detector units, you might encounter some challenges:
Detector Still Chirping After Battery Replacement
If your detector continues chirping after installing a new battery:
- Ensure the battery is properly seated and making good contact
- Clean the battery contacts with a dry cloth
- Check for the correct battery type
- Reset the detector by pressing and holding the test button for 15-20 seconds
- The detector may need to be replaced if it’s over 10 years old
Stuck or Corroded Batteries
When batteries leak or corrode:
- Use a pencil eraser to gently clean terminal contacts
- Never use metal tools that could damage the detector
- If corrosion is severe, the detector may need replacement
- Always wear gloves when handling corroded batteries
Can’t Remove Detector from Mounting Bracket
If you’re struggling to remove the detector:
- Look for locking pins or tabs that might need to be pressed
- Check for tamper-resistant features that require a screwdriver to release
- Apply slightly more twisting force, but never force it excessively
- Consult your detector’s manual for specific release mechanisms
Important Safety Considerations
When learning how to remove battery from smoke detector units, keep these safety tips in mind:
- Never disconnect your only working smoke detector, even temporarily
- Replace batteries in all detectors at the same time for consistent protection
- Always test detectors after battery replacement
- Consider replacing detectors that are over 10 years old, regardless of battery condition
- Keep track of when you last changed the batteries (mark the replacement date on the inside of the detector)
According to the most recent data from the Consumer Product Safety Commission (2023), smoke detectors with working batteries decrease the risk of dying in a home fire by nearly 55%. This statistic highlights why proper battery maintenance is critical.
⚠️ SAFETY WARNING
In the United States, approximately 2,620 people die annually in home fires. Working smoke alarms cut the risk of dying in a home fire by 50%. Never leave your home unprotected by ensuring all detectors have working batteries at all times.
Proper Battery Disposal
After learning how to remove battery from smoke detector units, don’t forget about proper battery disposal:
- Never throw batteries in regular trash (they contain hazardous materials)
- Use designated battery recycling points at hardware stores or recycling centers
- Cover battery terminals with tape before disposal to prevent short circuits
- Check local regulations for specific disposal guidelines
Many retailers like Home Depot, Lowe’s, and Best Buy offer free battery recycling services. For information on recycling locations near you, visit Call2Recycle.
State-Specific Smoke Detector Requirements
Some states have specific requirements regarding smoke detectors that may affect how you maintain them:
California
California law requires smoke alarms to have a 10-year non-removable battery or be hardwired with battery backup in all residential properties.
New York
New York State requires all new or replacement smoke detectors to be powered by a 10-year sealed battery or hardwired as of April 1, 2019.
Massachusetts
Massachusetts requires smoke detectors to be less than 10 years old and placed on every level of the home.
Florida
Florida building code requires smoke alarms in every bedroom, outside each sleeping area, and on every level of the home.
Always check your local and state regulations for the most current requirements. For detailed information on your area, visit the National Fire Protection Association.
Seasonal Battery Change Guide
Creating a regular schedule for battery changes helps ensure your smoke detectors are always operational:
Spring (March)
- Change batteries during daylight saving time
- Dust and vacuum detector exteriors
- Test all units after battery replacement
Summer (June)
- Check battery connections for corrosion
- Test all detectors during summer storms season
- Replace any detectors that are approaching 10 years of age
Fall (November)
- Change batteries during standard time change
- Check manufacturer dates on all units
- Update battery replacement log
Winter (December)
- Extra check before holiday decorations go up
- Test all detectors during peak heating season
- Ensure carbon monoxide detectors also have fresh batteries
Recommended Battery Brands and Products
For optimal smoke detector performance, consider these high-quality battery options:
9-Volt Batteries
- Energizer Ultimate Lithium 9V
- Duracell Optimum 9V
- Panasonic Platinum Power 9V
AA Batteries
- Energizer Ultimate Lithium AA
- Duracell Quantum AA
- Amazon Basics AA Alkaline
Battery Value Packs
- Bulk packages from warehouse stores offer the best value
- Consider lithium batteries for longer life in hard-to-reach detectors
- Look for “smoke alarm specific” batteries with extended life
Technical Terms Glossary
Understanding technical terminology related to smoke detectors can help you better maintain your safety equipment:
- Ionization Detector: Uses radioactive material to detect small particles produced by fast-burning fires
- Photoelectric Detector: Uses light sensors to detect large particles produced by smoldering fires
- Interconnected System: Multiple detectors that communicate so when one triggers, all sound
- Hardwired: Connected directly to your home’s electrical system
- Battery Backup: Secondary power source for hardwired detectors during power outages
- Tamper Resistant: Feature that prevents easy removal of batteries or detector
- Sensing Chamber: Internal component where smoke is detected
- Battery Caddy: The compartment that holds batteries in some models
- End-of-Life Warning: Signal indicating the entire detector needs replacement
Mobile Optimization for Battery Replacement
When you need to remove battery from smoke detector units quickly, these mobile-friendly tips can help:
Use your smartphone flashlight to better see battery compartments in dim lighting.
Keep these key steps handy when you’re on a ladder:
- Twist left to remove
- Open battery door
- Note battery orientation
- Replace with fresh battery
- Test before reinstalling
- Twist right to secure
For hardwired models, take a quick photo of the wire connections before disconnecting to remember the proper arrangement.
Voice Search Questions Answered
“Hey Google, how do I stop my smoke detector from beeping?”
To stop your smoke detector from beeping, you need to replace its battery. Remove the detector by twisting counterclockwise, open the battery compartment, replace the old battery with a fresh one, then reinstall by twisting clockwise.
“Alexa, when should I change smoke detector batteries?”
You should change smoke detector batteries at least once per year, typically during daylight saving time changes in spring and fall. Also change them immediately when you hear the low battery chirping sound.
“Siri, what kind of battery does my smoke detector need?”
Most smoke detectors use either a 9-volt battery or AA batteries. Check your specific model by removing the detector from its mounting bracket and looking at the current battery type or checking the manufacturer’s label.
Important Statistics on Smoke Detector Efficacy
Recent research from the National Fire Protection Association provides compelling evidence for proper smoke detector maintenance:
- 3 out of 5 home fire deaths occur in homes with no smoke alarms or non-functioning alarms
- The death rate in home fires is 55% lower in homes with working smoke alarms
- Dead batteries cause approximately 23% of smoke alarm failures
- In fires where smoke alarms were present but did not operate, 43% had missing or disconnected batteries
- Smoke alarms operated in 87% of reported home fires when they had working batteries
These statistics underscore the importance of knowing how to remove battery from smoke detector units and replace them properly.
Frequently Asked Questions About Smoke Detector Batteries
<!– Add FAQ Schema Markup Here –>
How often should I change smoke detector batteries?
While annual replacement is the minimum recommendation, changing batteries twice a year during daylight saving time changes creates a helpful reminder system.
Why does my smoke detector keep chirping after battery replacement?
This could indicate the battery isn’t properly seated, the wrong type of battery was used, or the detector itself has reached the end of its lifespan and needs replacement.
Can I use rechargeable batteries in smoke detectors?
Most manufacturers don’t recommend rechargeable batteries as they can lose charge more quickly and don’t provide consistent power output critical for safety devices.
How can I remember when I last changed the batteries?
Write the installation date directly on the battery with a permanent marker, or keep a home maintenance log with battery replacement dates.
Do hardwired smoke detectors need battery replacement?
Yes! Hardwired detectors have battery backups to ensure they function during power outages, and these batteries need regular replacement.
Conclusion
Learning how to remove battery from smoke detector units is a simple yet vital home maintenance skill. By following the steps outlined in this guide, you can ensure your home’s smoke detectors remain in proper working order, providing the early warning that could save lives in case of fire.
Remember that smoke detectors are your first line of defense against home fires, and properly functioning batteries are essential to their operation. Make battery replacement a regular part of your home maintenance routine, and never ignore that persistent chirping sound.
Take Action Now: Check your smoke detectors today! If you hear chirping or it’s been over 6 months since your last battery change, follow our guide to ensure your home remains protected.
For more information on smoke detector maintenance, battery types, and fire safety, visit our comprehensive resources at Smoke Detector Beeping and check our detailed battery guide for specific recommendations for your detector model.
Stay safe by keeping your smoke detectors properly powered and maintained. A few minutes spent replacing batteries can provide years of protection and peace of mind.
This guide on how to remove battery from smoke detector units is provided for informational purposes. Always follow manufacturer instructions for your specific smoke detector model. When in doubt, consult with a fire safety professional.
发表回复