
That sound. That single, high-pitched chirp slicing through the quiet, usually when you least expect it – maybe 3 AM, maybe during your favorite movie. It’s not the full-blown emergency siren (thank goodness!), but it’s relentless, annoying, and honestly, a little unsettling. What’s it trying to tell you? Is something seriously wrong? And most importantly, how do you make it stop? If that maddening intermittent beep is currently driving you up the wall, you’re in exactly the right place. Learning how to stop smoke detector from chirping isn’t just about regaining your peace and quiet; it’s a vital part of ensuring your home’s safety net is working correctly.
Welcome to SmokeDetectorBeeping.com! We understand just how disruptive and frustrating a chirping smoke detector can be. We’ve all been there. Our goal is to walk you through, step-by-step, not just silencing that noise, but understanding why it’s happening, so you can be confident that the device meant to protect your home and loved ones is ready for action.
First Things First: Chirp vs. Full Alarm
Before we dive into solutions, let’s be crystal clear about the sounds.
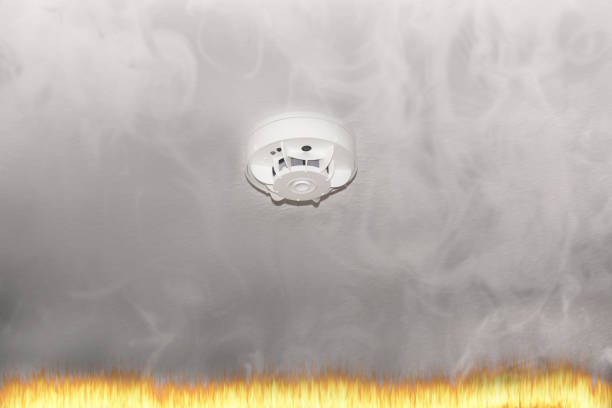
Full Alarm: A loud, continuous, ear-splitting shrieking or a standardized T3 pattern (three beeps followed by a pause, repeating). NEVER ignore this sound. This indicates a potential fire or dangerous smoke levels. Your immediate action should be to evacuate everyone from the home safely and call emergency services (like 911) from outside.
Chirp: A single, short, high-pitched beep occurring intermittently, usually every 30 to 60 seconds. This is what we’re focused on today. The chirp is a trouble signal or a maintenance alert from the detector itself. It’s not signaling immediate danger, but it is signaling that something needs your attention. Figuring out how to stop smoke detector from chirping involves diagnosing that signal.
The Most Common Culprit: A Low Battery
Nine times out of ten, maybe even more often, that persistent chirp is simply telling you the battery is running low. Think of it like the fuel light in your car – it’s an early warning system. Smoke detectors are designed to give you plenty of notice before the battery dies completely, ensuring the device remains operational while you have time to address it. It’s a crucial safety feature.
So, the very first, and most likely, step in learning how to stop smoke detector from chirping is replacing the battery.
Step-by-Step Guide: Replacing the Smoke Detector Battery
Let’s walk through this carefully. Doing it right the first time can save you a lot of headaches.
- Identify the Chirping Unit: If you have multiple detectors (which is recommended for proper coverage), take a moment to listen closely and pinpoint exactly which one is making the noise. In interconnected systems, usually only the unit with the low battery will chirp initially.
- Safety First! Especially for Hardwired Units:
- Battery-Only Units: If your detector runs only on batteries (no wires going into the ceiling/wall), you can skip this part.
- Hardwired Units: These detectors are connected to your home’s electrical system but also have a backup battery. For safety, always turn off the power to the smoke detector circuit at your breaker box before you attempt to remove the unit or change the battery. Look for a breaker labeled “Smoke Detectors,” “Alarms,” “Bedrooms,” or similar. If you’re unsure which breaker it is, you can turn off the main power, but be prepared for everything else to shut off too. Working with electricity can be dangerous; always prioritize safety.
- Remove the Detector: Gently twist the smoke detector counter-clockwise to detach it from its mounting bracket on the ceiling or wall. Some models might have a small locking tab you need to press or slide first. Check for arrows or instructions on the detector body. If it’s hardwired, it will still be connected by a small wiring harness – don’t yank it!
- Disconnect Wiring (Hardwired Only): If hardwired, carefully unplug the wiring harness connector from the back of the detector. There’s usually a small clip you press to release it.
- Open the Battery Compartment: Find the battery door. It might be on the back or slide out from the side. Open it.
- Remove the Old Battery: Note the type (usually 9-volt rectangular, or sometimes AA/AAA) and how the positive (+) and negative (-) terminals are oriented. Take the old battery out.
- The CRUCIAL Step: Drain Residual Charge: This step is missed surprisingly often but solves many persistent chirping issues! After removing the old battery, press and hold the “Test” or “Silence” button on the detector for at least 15-30 seconds. This discharges any leftover power stored inside the detector. If you skip this, the detector might not recognize the new battery immediately and could keep chirping, making you think the problem wasn’t the battery.
- Install the New Battery:
- Use a brand new, high-quality battery of the exact type specified by the manufacturer (check the detector label or manual). Don’t try to save a few pennies with an old or cheap battery; your safety depends on it.
- Pay close attention to the correct polarity (+/- terminals). Installing it backward will prevent it from working.
- Use the recommended battery type. Most specify alkaline. Some newer models with long-life sealed batteries don’t need replacement, but most traditional ones do. The National Fire Protection Association (NFPA) advises using batteries as recommended by the device manufacturer. You can find more general fire safety tips from the NFPA on their Safety Tip Sheets page.
- Avoid using rechargeable batteries unless the smoke detector manufacturer explicitly states they are compatible. Rechargeables often have different voltage characteristics that can cause premature low-battery warnings or unreliable operation.
- Close the Battery Compartment: Make sure the door snaps securely shut. A loose connection here can also cause chirps.
- Reconnect Wiring (Hardwired Only): Plug the wiring harness back into the detector. It should click firmly into place.
- Reattach the Detector: Align the detector with the mounting bracket and twist it clockwise until it locks securely.
- Restore Power (Hardwired Only): Go back to your breaker box and turn the power to the smoke detector circuit back on.
- TEST THE DETECTOR (Mandatory!): This is non-negotiable. Press and hold the Test button. You should hear the loud, continuous alarm sound (not the chirp). This confirms the new battery is working, the detector has power, and the alarm sounder itself functions. If your detectors are interconnected, testing one should ideally make all the others sound off too. This confirms the entire system is communicating.
For many people reading this, successfully completing these steps will bring blessed silence. The annoying chirp vanishes, replaced by the quiet confidence of a working safety device. Understanding how to stop smoke detector from chirping often starts and ends right here.
Troubleshooting: When the Chirping Won’t Stop
But what if you’ve carefully replaced the battery, performed the residual charge drain, tested it, and still hear that infernal chirp? Or maybe it stopped, only to start again hours or days later? Okay, don’t throw the detector out the window just yet! While a low battery is the prime suspect, other culprits might be at play. Figuring out how to stop smoke detector from chirping in these cases requires a bit more investigation.
End-of-Life (EOL) Signal
Smoke detectors are not immortal. Most smoke detectors have a lifespan of 7 to 10 years. After this time, the sensors inside degrade and become less reliable at detecting smoke. To warn you, many modern detectors have a built-in “End-of-Life” or “EOL” signal.
- What it sounds like: This might be a different chirp pattern (e.g., 3 chirps every minute, or 5 chirps) or a combination of chirps and flashing lights (often yellow or amber). Check your detector’s manual or the manufacturer’s website for its specific EOL signal.
- How to check: Look on the back or side of the detector unit. There must be a label indicating the date of manufacture (MFG Date) or an expiration/replace-by date.
- The solution: If your detector is older than 10 years from the manufacture date (or past its specific expiry date), no amount of battery changes will stop the EOL chirp. The only solution is to replace the entire smoke detector unit. This is the definitive way how to stop smoke detector from chirping when it’s simply worn out.
Improper Battery Installation or Connection
Go back and double-check your work from the battery replacement steps:
- Is the battery type correct? (9V, AA, AAA as required?)
- Is it installed the right way around? (+/- terminals correct?)
- Is it snapped in securely? Sometimes the contacts need a firm connection.
- Did a piece of the plastic pull-tab tear off and get stuck, blocking the connection? Inspect closely.
- Is the battery compartment door fully closed and latched? A slightly open door can interrupt power.
Residual Charge Issue (Yes, Again!)
It’s worth repeating because it’s so common. If you’re sure the battery is good and the detector isn’t expired, try this one more time: Remove the battery, press and hold the test button for a solid 30 seconds (longer than you think!), then reinstall the battery and test again.
Environmental Factors
Smoke detectors can be sensitive to their surroundings. Sometimes, the chirp isn’t about the battery or age, but the environment:
- Temperature Extremes & Fluctuations: Is the detector in an unheated attic, a garage, near a poorly insulated window, or right next to an HVAC vent? Rapid temperature swings can affect battery voltage temporarily or even trigger false alarms or chirps. Consider relocating it slightly if possible, ensuring it’s still compliant with placement guidelines.
- High Humidity & Steam: Detectors installed too close to bathrooms (showers) or kitchens (cooking) can sometimes chirp or false alarm due to steam or condensation entering the sensing chamber. Ensure good ventilation (use exhaust fans). If it’s a persistent problem, you might need to move the detector further away (but still protecting the area). Photoelectric detectors are generally less prone to cooking nuisance alarms than ionization types, but heavy steam can affect both. Understanding the different types can be helpful; the NFPA explains smoke alarm technologies on their site.
- Dust, Cobwebs, and Insects: Over time, dust or even tiny insects can get inside the detector’s sensing chamber, obstructing the sensor and causing chirps or reducing sensitivity. Regular cleaning is essential (more on this in prevention).
Hardwired Detector Specific Issues
If your system is hardwired, the problem might be with the AC power connection:
- Power Interruption/Fluctuations: A brief power outage, brownout, or power surge can sometimes cause detectors to chirp when power is restored or if the AC supply is unstable. Check your breaker box – did the smoke detector circuit trip? If it trips repeatedly, you might have an underlying electrical issue needing professional attention.
- Loose Wiring: The connections between the detector and the house wiring, or between interconnected detectors, might be loose. This can happen over time or after recent electrical work. Warning: Working with household wiring is dangerous if you’re not trained. A loose wire can cause intermittent power loss, triggering chirps or malfunctions. If you suspect loose wiring, it’s best to call a qualified electrician. Trying to fix it yourself without expertise could lead to shock or fire hazards. Understanding how to stop smoke detector from chirping in a hardwired system sometimes means knowing when to call for help.
- Incompatible Units: If you have an interconnected system and recently replaced just one detector, ensure the new unit is compatible with the old ones. Mixing brands, or even different models from the same brand, can sometimes cause communication errors leading to chirping or other malfunctions. Always check compatibility information before replacing units in an interconnected system.
Device Malfunction
Sometimes, despite your best efforts and ruling everything else out, the detector itself might simply be faulty. Internal components can fail randomly, leading to persistent chirping that doesn’t respond to any troubleshooting. If the detector is well within its 10-year lifespan, has a fresh battery, is clean, and environmental/power issues are ruled out, a malfunction is a strong possibility. Check the manufacturer’s warranty – you might be eligible for a replacement. If it’s out of warranty but not yet expired, replacement is still the safest course of action. For complex situations that might point towards a malfunction, exploring resources like our page on Alarm Issues and Solutions could provide more specific scenarios.
Silence Button Problems
Most detectors have a “Silence” or “Hush” button to temporarily quiet nuisance alarms (like from slightly burnt toast). Occasionally, this button might get stuck partially pressed, damaged, or the silencing feature itself could malfunction, causing intermittent chirps. Try pressing the button firmly a few times to ensure it moves freely. Check your manual to understand how the silence feature is supposed to work and if its malfunction could cause chirping.
Preventative Maintenance: Keeping the Chirps Away
Wouldn’t it be nice to avoid that 3 AM wake-up call altogether? Consistent maintenance is key:
- Replace Batteries Annually (for non-sealed units): Even if they aren’t chirping, replace batteries in all your non-sealed detectors at least once a year. A great reminder is when you change your clocks for daylight saving time. Use high-quality alkaline batteries and write the installation date on the battery with a marker. (Detectors with sealed 10-year batteries don’t need this, just replacement of the whole unit at 10 years).
- Test Detectors Monthly: Make it a habit. Press and hold the test button on every detector, every month. It takes seconds and confirms the power, electronics, and sounder are working.
- Clean Detectors Regularly: Gently vacuum your smoke detectors using a soft brush attachment every six months. This removes dust, cobwebs, and potential insect intruders from the vents and sensing chamber. You can also use compressed air (held upright, short bursts from a distance) carefully. Do this while the detector is temporarily removed. Regular cleaning is probably the best thing you can do after battery changes to prevent nuisance chirps.
- Respect the Expiration Date: Replace all smoke detectors every 10 years (or sooner if the manufacturer specifies). Write the replacement date (10 years from MFG date) on the detector when you install it. Sensor technology improves, and old sensors degrade. Proactive replacement avoids EOL chirps and ensures reliable protection.
- Install Detectors Properly: Follow manufacturer instructions and national/local codes for placement. The NFPA provides clear guidelines on smoke alarm placement. Key locations include inside each bedroom, outside each sleeping area, and on every level (including basements). Avoid installing too close to kitchens, bathrooms, heating/cooling vents, or drafty windows to minimize environmental triggers.
When Should You Call a Professional?
While most chirping issues are DIY-fixable, there are times when calling in help is the smartest and safest choice:
- You suspect loose wiring or electrical issues with a hardwired system.
- The circuit breaker for your smoke detectors keeps tripping.
- You’ve tried all the troubleshooting steps, and the chirping persists on multiple interconnected units.
- You’re uncomfortable performing any of the steps, especially those involving electrical power or climbing ladders.
A qualified electrician can safely diagnose and repair wiring issues, test the circuit, and ensure your hardwired system is functioning correctly. Your safety is always the top priority.
Conclusion: Peace, Quiet, and Safety Restored
That relentless smoke detector chirp is undeniably irritating, capable of disrupting sleep and fraying nerves. But remember, it’s not just noise – it’s a signal demanding attention for a reason. By patiently working through the possibilities, starting with the simple battery change (done correctly!), moving to cleaning, checking the age, considering the environment, and addressing potential system issues, you can almost always pinpoint and resolve the cause. Mastering how to stop smoke detector from chirping empowers you to maintain these life-saving devices effectively.
Your smoke detectors are your silent guardians. Taking a few minutes for routine maintenance and promptly addressing trouble signals like the chirp ensures they are ready to sound the alarm loudly and clearly if a real fire emergency occurs. Never disable a smoke detector just because it’s chirping – find the cause and fix it. The peace of mind that comes from knowing your detectors are working correctly is invaluable.
We hope this comprehensive guide helps you silence that chirp and restore both quiet and confidence in your home’s safety. For more tips and information on smoke alarm care, feel free to explore more resources right here at SmokeDetectorBeeping.com. Stay safe!
发表回复